Gluten free sugar cookies

These are awesome!!!

INGREDIENTS

FOR SUGAR COOKIES:

6.3 ounces (12 ½ tbsp.) unsalted butter, at room temperature

1/2 cup (90g) granulated sugar

1/2 + 1/8 (2g) teaspoon kosher salt

1 teaspoon (5.9g) vanilla paste or extract

1 3/4 cups + 3 tablespoons (270g) Cup4Cup flour

1/2 teaspoon baking powder

1 egg

FOR SUGAR COOKIE FROSTING:

1 cup (120g) confectioners’ sugar

Assorted food coloring

2 teaspoons (10g) milk or water

1/4 teaspoon (1.3g) almond extract ( optional)

INSTRUCTIONS

FOR SUGAR COOKIES:

  1. Place butter in the bowl of a stand mixer fit with a paddle attachment. Turn to medium-low speed and cream until smooth. Add the egg, sugar and salt and mix on medium low for about 2 minutes, until fluffy. Scrape down sides and bottom of bowl. Add vanilla paste and mix on low speed for about 30 seconds to distribute evenly.
  2. Add the baking powder and then the flour in 2 additions, mixing on low speed for 15 to 30 seconds after each, or until just combined. Scrape the bottom of the bowl to incorporate any flour that may have settled there.
  3. Mound the dough on the work surface and push it together in a 5 inch square block. Wrap in plastic and refrigerate for 1 hour, or until firm.
  4. Position racks in oven and preheat to 325°F. Line 2 baking sheets with Silpats or parchment paper.
  5. Unwrap dough and place it between 2 pieces of parchment paper or plastic wrap. With a rolling pin, pound the top of the dough, working from left to right, to begin to flatten it, then turn the dough 90 degrees and repeat. Roll the dough out to about ¼ in thick on a well floured surface to prevent sticking. Use decorative cutters to cut out the cookies and place on sheet pans, leaving space between them. NOTE: If dough is very stiff, squeeze in your hands to make it more pliable.
  6. Bake until pale golden brown, about 10-15 minutes, reversing the position of the sheet pan halfway through baking. Take note that the baking time will vary depending on the size of the shapes used. Set pans on cooling rack for 5-10 minutes and then transfer cookies to the rack and cool completely.

FOR SUGAR COOKIE ICING:

  1. Stir sugar and milk together until smooth.
  2. Beat in corn syrup and almond extract until icing is smooth and glossy. If icing is too thick, add more corn syrup.
  3. Divide into separate bowls and add desired food colorings.

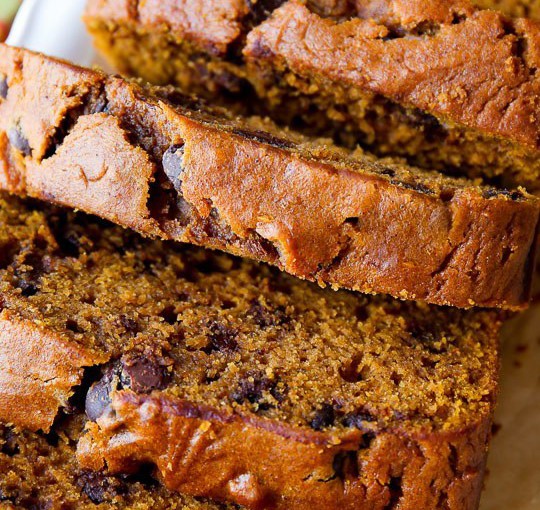
Pumpkin Chocolate Chip Bread or Muffins!

An all time Amanda favorite! Yummmmm! Moist, chocolatey, and perfect fit the holidays!

Ingredients:

  • 1 and 3/4 cups (220g) all-purpose flour
  • 1 teaspoon baking soda
  • 2 teaspoons ground cinnamon
  • 1/4 teaspoon ground nutmeg
  • 1/4 teaspoon ground cloves
  • 3/4 teaspoon salt
  • 2 large eggs
  • 3/4 cup (150g) granulated sugar
  • 1/2 cup (100g) packed light or dark brown sugar
  • 1 and 1/2 cups (340g) pumpkin puree (canned or fresh)
  • 1/2 cup (120ml) vegetable oil, canola oil, or melted coconut oil (GREAT w/ olive oil!!)
  • 1/4 cup milk
  • 2/3 cup (120g) semi-sweet chocolate chips

Directions:

  1. Adjust the oven rack to the lower third position and preheat the oven to 350F degrees. Lowering the oven rack prevents the top of your bread from browning too much too soon. Spray a 9×5 inch loaf pan with non-stick spray. Set aside.
  2. In a large bowl, whisk the flour, baking soda, cinnamon, nutmeg, cloves, and salt together until combined. In a medium bowl, whisk the eggs, granulated sugar, and brown sugar together until combined. Whisk in the pumpkin, oil, and milk. Pour these wet ingredients into the dry ingredients and gently mix together using a rubber spatula or a wooden spoon. There will be a few lumps. Do not overmix. Gently fold in the chocolate chips.
  3. Pour the batter into the prepared loaf pan. Bake for 60-65 minutes, making sure to loosely cover the bread with aluminum foil halfway through to prevent the top from getting too brown. The bread is done when a toothpick inserted in the center comes out clean with only a few small moist crumbs. This may be before or after 50-65 minutes depending on your oven, so begin checking every 5 minutes at the 45 minute mark or so. (15-20ish mins for muffins!)
  4. Allow the bread to cool completely in the pan on a wire rack before removing and slicing. The bread will stay fresh in an airtight container (it tastes better on day 2!) at room temperature or in the refrigerator for up to 10 days. But it won’t last that long.
  5. Make ahead tip: Baked bread can be frozen up to 3 months. Thaw overnight in the refrigerator and bring to room temperature before serving.

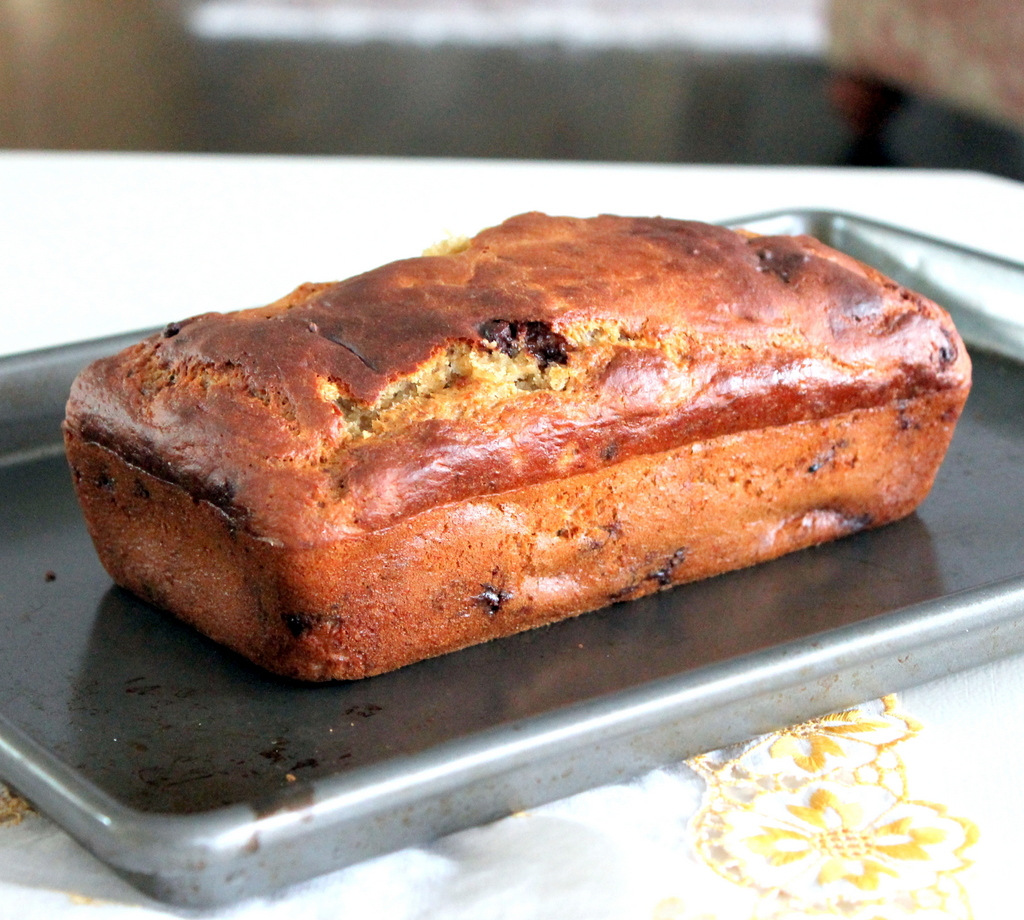
AMAZING Honey Whole Wheat Banana Bread!

Delicious, good-for-you, and easy to make!
INGREDIENTS
  • 1 1/2 cups whole wheat pastry flour
  • 3/4 teaspoon baking soda
  • 1/4 teaspoon baking powder
  • 1/4 teaspoon salt
  • 1 heaping cup mashed ripe banana (about 2-3 bananas)
  • 2 Tbsp honey
  • 3 tsp Brown Sugar
  • 1/3 cup nonfat vanilla greek yogurt
  • 1 tablespoon olive oil
  • 1 1/2 teaspoons vanilla
  • 2 1/2 tablespoons unsweetened vanilla almond milk
  • 1 egg
  • 1 egg white

INSTRUCTIONS

  1. Preheat oven to 325 degrees F. Grease a 8×4 or 9×5 loaf pan with cooking spray.
  2. In a large bowl, whisk together flour, baking powder,baking soda, and salt; set aside.
  3. In a large mixing bowl, combine mashed banana, honey, brown sugar, greek yogurt, olive oil, almond milk and vanilla and beat on low until smooth in consistency. Add in the egg and egg white and beat again until well combined, about 1 minute. Add the banana mixture to the flour mixture and combine until moist — It’s important to not over mix!
  4. Spoon all of the batter into the greased loaf pan. Bake at 325 degrees for 45-60 minutes or until a tester inserted into middle of the bread comes out clean. The length of time will vary based on which loaf pan you use, so I suggest checking the bread at 45 minutes. Also, don’t fear the golden crust! The bread may look done on the outside, but the inside is what’s important — you don’t want a gooey bread.
  5. Once a tester inserted into the bread comes out clean, cool for 10 minutes in pan on wire rack, then remove from pan gently and cool completely on wire rack. Cut into 12 slices and enjoy!
NOTES
If you’d like to freeze your bread, simply wait until bread is completely cool, then slice and individually wrap in cling wrap and place in the freezer. Once ready to eat, just toast or microwave your slice and spread with your favorite topping.
It can be made with chocolate chips too!